
- Login
Below are a collection of photographs that I took while painting the artwork “Gossamer Princess” to demonstrate some of my techniques and processes I use when painting. Obviously not all of my paintings are done the same way, and I use different mediums and techniques all the time, so this just shows a little of how I work. Sorry about the poor quality and blurry photos, I often had to take them very quickly and keep working.
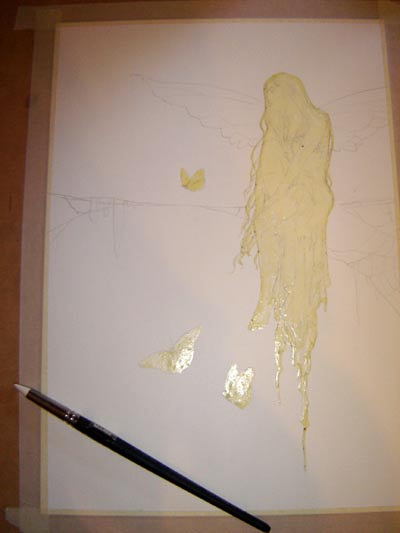
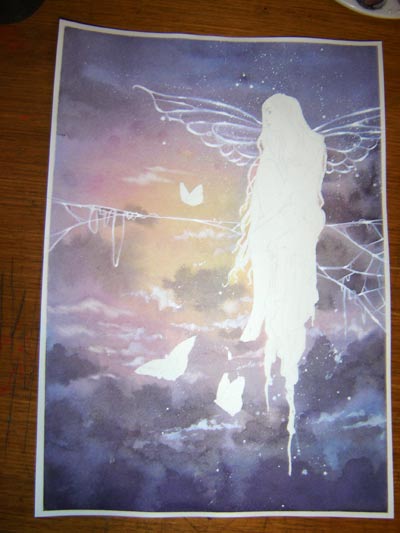
OK, Starting out with the sketch, I masking tape it to some board (not actually properly stretching the paper though) and I use masking fluid to cover up the whole figure and butterflies. I don’t often use masking fluid, but as you’ll see in the next step, I REALLY needed to for this one! The tool I use for masking fluid is in the photo, the rubber tipped thing, it’s great for getting a precise line with the fluid, but I only outline the detailed edges of large areas with it, then paint in the area with a soft brush because I find it can damage the surface of the paper.
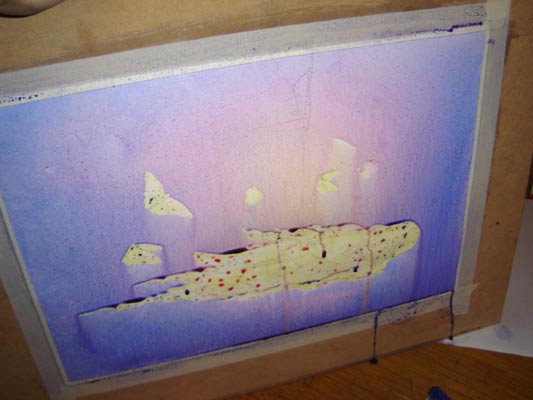
Sometimes even when doing large washs I don’t use a mask, but you can see above this is why I couldn’t live without a mask for this one! This technique is really cool, I got it from the “How to make watercolor paint itself” book. Unfortunately as you have to work so fast I didn’t get a photo of the first step, which is basically painting one big yellow circle in the middle, then a big red circle around that, then a big blue circle around that, filling the whole area. You then tilt the board up, and spray it with a misting spray gun so all the paint runs into each other, mixing the colours and running all over the place (and would be all over the figure if I didn’t mask it off). You just keep turning it around and letting it run and blend, using a tissue to try and gently mop up the larger runs or where it pools around the mask as you go. And watch you don’t spill it all over your carpet, lol 😉
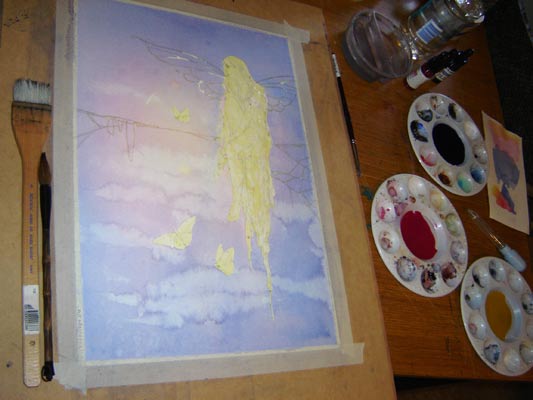
I’m going to be having lots of clouds in the background, so I ruin my nice even wash by using a tissue to sponge up some colour, and then clear water to create more starburst things (can’t remember the technical term) and creating the beginnings of cloud like textures. In this photo you can see two of my favourite brushes in the photo, chinese soft brushes. The big mop I use for things like washes in the first step, and the smaller round brush I use for all other wet in wet work where I want to drop paint in delicately without having to mash a brush onto the paper. I’ve masked out the cobweb and fairies wings as well now over the first wash so they have some light colour in them, but won’t be darkened by the next steps, then repeat the same wash process for a darker background again. That’s what the three pools of blue, red and yellow paint on the side are prepped for. You can also see a medicine dropped near them which I use for adding in water to my washes.
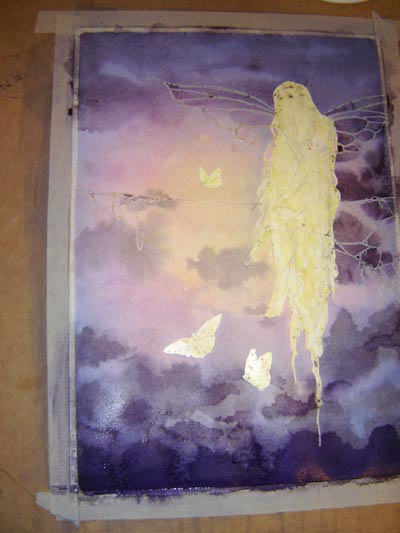
Now I’ve got the nice glowy wash down, I want to put in darker clouds. I use a mix of dioxanine purple with some warm yellow to tone it down (using complementary colours rather than browns or greys to darken colours creates a richer less muddy colour). I use my big chinese mop with clean water to wet down areas, and then drop in paint with the smaller round chinese mop. The chinese brush is so delicate you can sort of guide and poke and move the wet in wet paint with it without screwing it up like you can with other brushes if you try poking at washes.
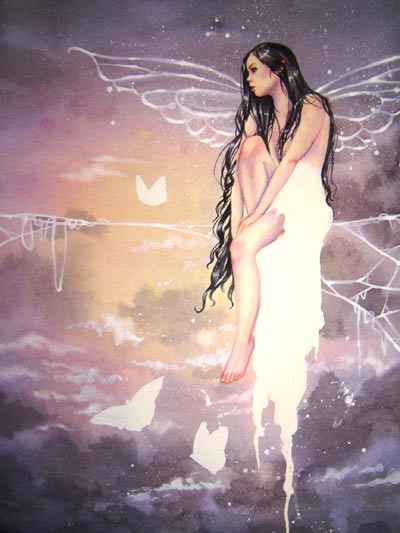
As usual, I’m terribly impatient (and know I’ve only got the one day to finish this painting), so as soon as my clouds are dry I strip off all the masking fluid and tape. I then use white gouache to touch up the cobweb, wings, and add sparklies!
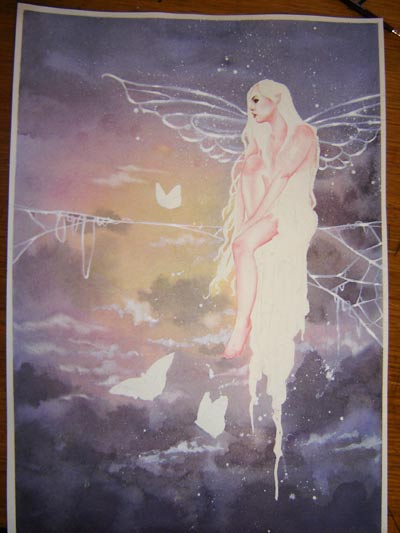
I can finally get to work on the figure, yay! I do some detailing in the face first because I’m always impatient to get the face done! I use dark reds, browns and blacks for the facial details. Then I use Rose Dore, one of my favourite colours for skin tones, to shade in the whole figure.
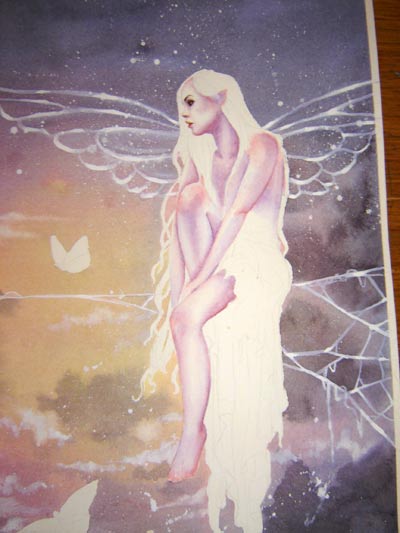
Then I use that brilliant dioxanine (or however it’s called) purple again, diluted down a fair bit, to continue shading the skin even darker. Then a cobalt blue for the deepest shadows… I want her skin to have very purple shadows to match the purples in the background.
Then the magic step! Take some yellow ochre, or some other light yellowy orange brown colour, and wash over the whole skin, and viola, you have skin tone! (except it looks all blurry and gross from my camera here! Sorry!)
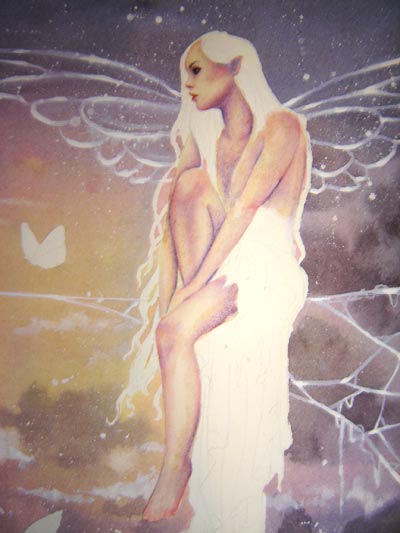
I paint in the hair with one of my other favourite colours, Neutral tint, and a tiny bit of opaque white again for highlights. When painting hair, I always use a small to medium size brush, that still has a good, neat point on it (so one of my newest brushes instead of an old one) so that I can create the appearance of neat individual strands of hair.
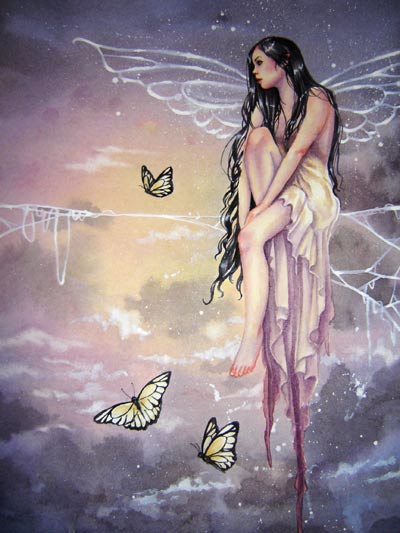
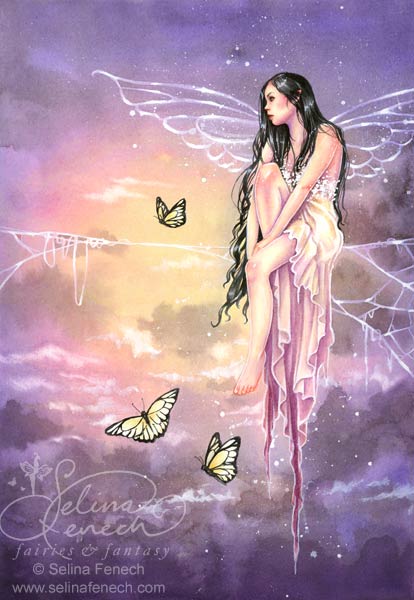
I paint in the butterflies, also with yellow ochre and neutral tint, and then the dress… Then over the top of the dress I add all the little sequiny looking sparkles with white gouache, some final touches and she’s finished!!
As you can see my scanner picks up the true colour much better than my digital camera. By the time I was finished I was also without any natural light (about 10 o’clock at night!), which is generally a big no-no for painting, (and photography), but it needed to be finished!
12 thoughts on “Painting Walkthrough "Gossamer Princess"”
I love this one, Selina. The colours are so perfect. <3
i really love the way u explain these hard technique and make them eash to understand love ur art u have an amazing gift love the colours are grt its simply awe-sum xoxo
hi 🙂 my name is angel and I <3 the legend of the seeker TV show and book ad I was wondering if when you got the chance if you could paint a picture of kahlan in her "confessor" dress? please? Im writing a book and I would like that to be the cover. 🙂 I would be sure to give you credit. (Im 13 and broke : )
XOXO
Angel
Selina, you painting this masterpiece, abd showing us the steps, has enlightened me on how to paint wonderful pictures:)
I love those colors!
When you say white gouache, do you mean this,
http://shop.hobbylobby.com/products/talens-gouache-paint-627448/
Thank you!
Something like that is good. Pro-White is also a great, dense white http://www.cheapjoes.com/art-supply/DR1101_4532_daler-rowney-pro-white-process-white-opaque-watercolor.asp
But I also use acrylic whites now as well, depending on the artwork. Anything with a strong opacity and bright white is good.
Connection is what I feel from your Art and your spirit makes it live!!!! Thank You for inspiring us with your love. Thank You for Being You!!!
What exactly is masking tape and masking fluid, and where can you buy some at???
Masking tape is just like a sticky tape made of paper- available at art shops, building supplies (in the painting section) and even probably some grocery stores. Masking Fluid is liquid latex, which is brushed onto the paper in a shape you desire, and then dries. Once it’s dry you can paint over/around it and the space underneath stays white. Once the paint is dry, you peel the latex off the paper.
Hi Selena,
My question is if I don’t have masking fluid can I use school rubber cement?
Thank You
I’m not sure, it’s something I haven’t tried. You can have a go but test it on something that isn’t precious first!
Hi Selena, My Wife Loves Your Pictures & Is Very Much Into Coloring Helps Her Relax