
- Login
Graphite pencil was one of the first mediums I really extensively developed for my art. When I was starting out, I was paint-shy. Paint was just so intimidating and hard to control! So I stuck with trusty graphite (“lead”) pencils, and discovered just how much this simple tool can achieve. Some of my all time favourite works, and most popular artworks, are my graphite artworks from this time. Below you’ll find some tips for getting great results with graphite.
But what is Graphite?
Growing up, we always called them “lead” pencils. That’s a name that has stuck since earlier times when the pigment encased in the wood in the pencils actually WAS lead! Obviously for health reasons, this doesn’t happen any more, but generally we still call them “lead” pencils, even though the pigment inside them is now Graphite. It’s technically correct to call them graphite pencils, and understand what they are because most art supplies brands and stores will also refer to them as Graphite. Still, the actual pigment section of a pencil which is encased in wood, is generally referred to as “the lead”.
A range of pencils:
When drawing in graphite, I like to have a wide range of pencils available. Each pencil type has it’s own uses- you don’t want to be shading large areas with a fine mechanical pencil, nor do you want to be doing precision work with a stumpy, thick lead. I tend to use the following for most work-
Mechanical pencils: these are for precision work, all the finest details. I have them in sizes from 0.3 t0 0.9mm widths, and keep some in 2h leads, HB leads, and 2b. Great for drawing strands of hair as well!
Wood pencils: Just your standard, wood encased pencils. I have these in just about all darkness ranges, but generally use from 4H through to 9B, with 2B’s and 2H’s being the most commonly used. I particularly love my Conte graphite pencils, they are smooth as silk and have slightly thicker leads. Always keep your wood pencils sharpened, preferably with a stanley knife rather than a pencil sharpener, so you can get a good end and less breakage (also a good tip for colour pencils!)
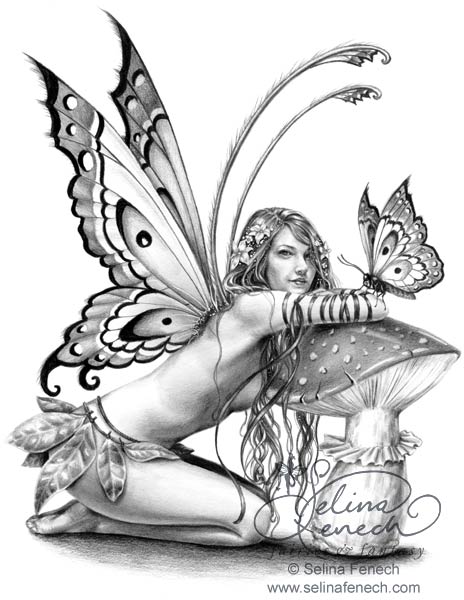
Progressos: These are the “lead” without any casing- just pure sticks of graphite. I use these for “special effects” mostly, but they are also great for some fun sketching, to help inspire and loosen up. By special effects, I mean creating interesting textures such as wood, or for example the background of the artwork below. The rough, spotty texture was done by lying a progresso flat on the paper on it’s longest side and rubbing it gently on the paper so it’s pigment caught just on a few points.
Erasers:
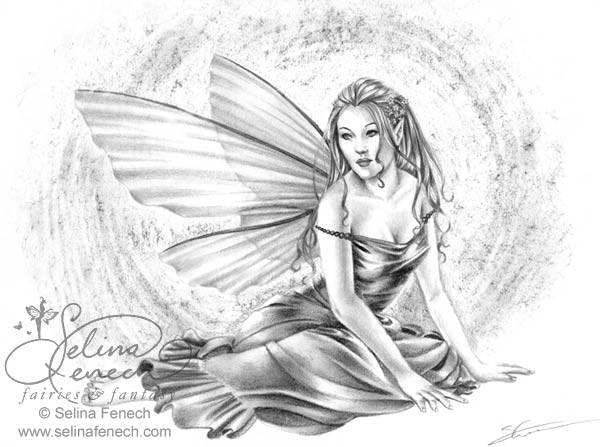
Erasers are as much of a painting tool with graphite as the pencils themselves. I use a range of different erasers for each artwork, which include: A putty eraser, a standard plastic rubber (of a quality that doesn’t smudge, I like Maped), and a couple of mechanical erasers (the kind with a tube of plastic eraser within a plastic dispenser pen). I also have an electric eraser, which has a small plastic eraser point which spins, efficiently lifting graphics from the paper. The artwork below is an example of erasers put to use. The sharp white edges of the fully clouds was erased out with an electric eraser. The streaks of light were done by softly dragging the putty eraser over the graphite shading. Even on the rocks, I made the putty eraser into a chunky, random shape and pressed it against the rock shading to lift some random shapes back out of the shading.

Smoothing the graphite:
Getting smooth shading is generally an important goal to most artists when it comes to pencil artworks, particularly to achieve smooth texture for things like skin. In the past, I would use items such as cotton bud, cotton balls, tissues, and “tortillons” (rolled pieces of paper for smudging) to smooth out my shading. Sometimes even my fingers (almost always a bad idea, oils from your skin can do nasty things and you end up with dirty fingers that will smudge everywhere). Using these tools both lifts and spreads the graphite particles around on the paper, lightning your darkest strokes and spreading the pigment onto clean areas, evening out the shading. However, doing this kind of blending can create very “muddy” looking shading, that then requires a lot of erasing to lift some graphite back off the lighter areas and re-darken the darker areas.
I’ve found lately that instead of using smudging at all, using graphite pencils from the “hard” range, eg, 2h, 3h, 4h etc (or for coloured pencils, harder, lighter colours) can be very good at creating smooth and delicate shading. It is important to shade very carefully and softly with them, because the graphite is quite hard and can scratch the paper if used with too much pressure. But delicate yet firm shading with hard pencils can create wonderfully soft and smooth shading with a much larger range of values. Use it over darker graphite shading to smooth it out and add a richer dimension to is as the hard lead pushes the darker lead into the paper surface more smoothly.

How not to smudge:
Lots of people ask this, and it’s a major issue when there is so much graphite pigment sitting on the paper surface! How do you stop from smudging when your hand is resting on the shaded areas? I used to use fixative as I drew, but don’t any more. I found it annoying if I fix an area then decided I wanted to work on it some more. Also, I just hate the smell of the stuff! As artists, we’re exposed to enough chemicals already, thank you very much. So I save fixative just for the very end now. To avoid smudging in the meantime, I keep my hands clean (wash with soap and water before starting to remove some of the oils from your skin is a good idea, and whenever your hand starts getting dirty again), and I keep a piece of scrap paper between my hand and the artwork it’s resting on. This barrier prevents a lot of smudging. Otherwise, don’t stress too much. A small amount of smudging can easily be cleaned off later with gently application of a putty eraser.
13 thoughts on “Graphite Pencil Drawing Tips”
Serena, just wondering do you draw your image straight on the paper you are to work on? Or do yu have a sketch you’ve done up and then transfer over onto?
Cheers 🙂
Most often I’ll sketch in my sketch book then transfer onto better paper to finish. I almost always draw/paint on Arches watercolour paper.
i love everything, u have so much heart in your work. i used to draw while growing up, i seemed to loss my touch…. but i love them. keep up the heart earned detication.
sincerly,
tiffani picciurro
Does your family ever ask you to draw or paint them any pictures? Or are they used to your talent and kind of just let you do your thing?
🙂
nice work selina
All of your faeries are lovely whether they are in pencil, paint or other medium! ♥
your sketches are awesome. i have tried to learn from. but i m not getting the proper finishing. what should i use for the light shades?
Pencils in the H range are good for light shades, as the lead in them is lighter and harder. Because it is also harder, be careful to shade softly so not to scratch the paper 🙂
im 13 and i need some tips on drawing faces
Hi Haley! Did you find my page at https://selinafenech.com/2011/tips-for-realistic-figures-and-faces/? There are some tips there. This site also has some good tutorials for starting out http://www.portrait-artist.org/face/structure.html. The face has certain proportions that all line up (like there should be the width of one eye between the eyes). This site has all that information for you 🙂 Once you learn those, it becomes easier to draw faces. They aren’t set “rules” since faces are all different, but they are good guidelines 🙂
Hello Selina,
I am Timna and i’m from the Netherlands, i make art on wood (pyrografic)
Can i use you drawings for this? i realy love your work!
You can send me an email for more information.
Greets from Holland!
Timna
I just love your work. Your sketches are tremendous. Your tips are really useful. I am gonna apply these and i also want more tips for drawing. Thanks for the sharing such as useful tips.
Greetings! Very useful advice within this post! It is the little changes that make the greatest
changes. Many thanks for sharing!